Type-2 portable charger
5/27/25

01. Product Introduction
This product model is divided into [No Screen] and [With Screen].
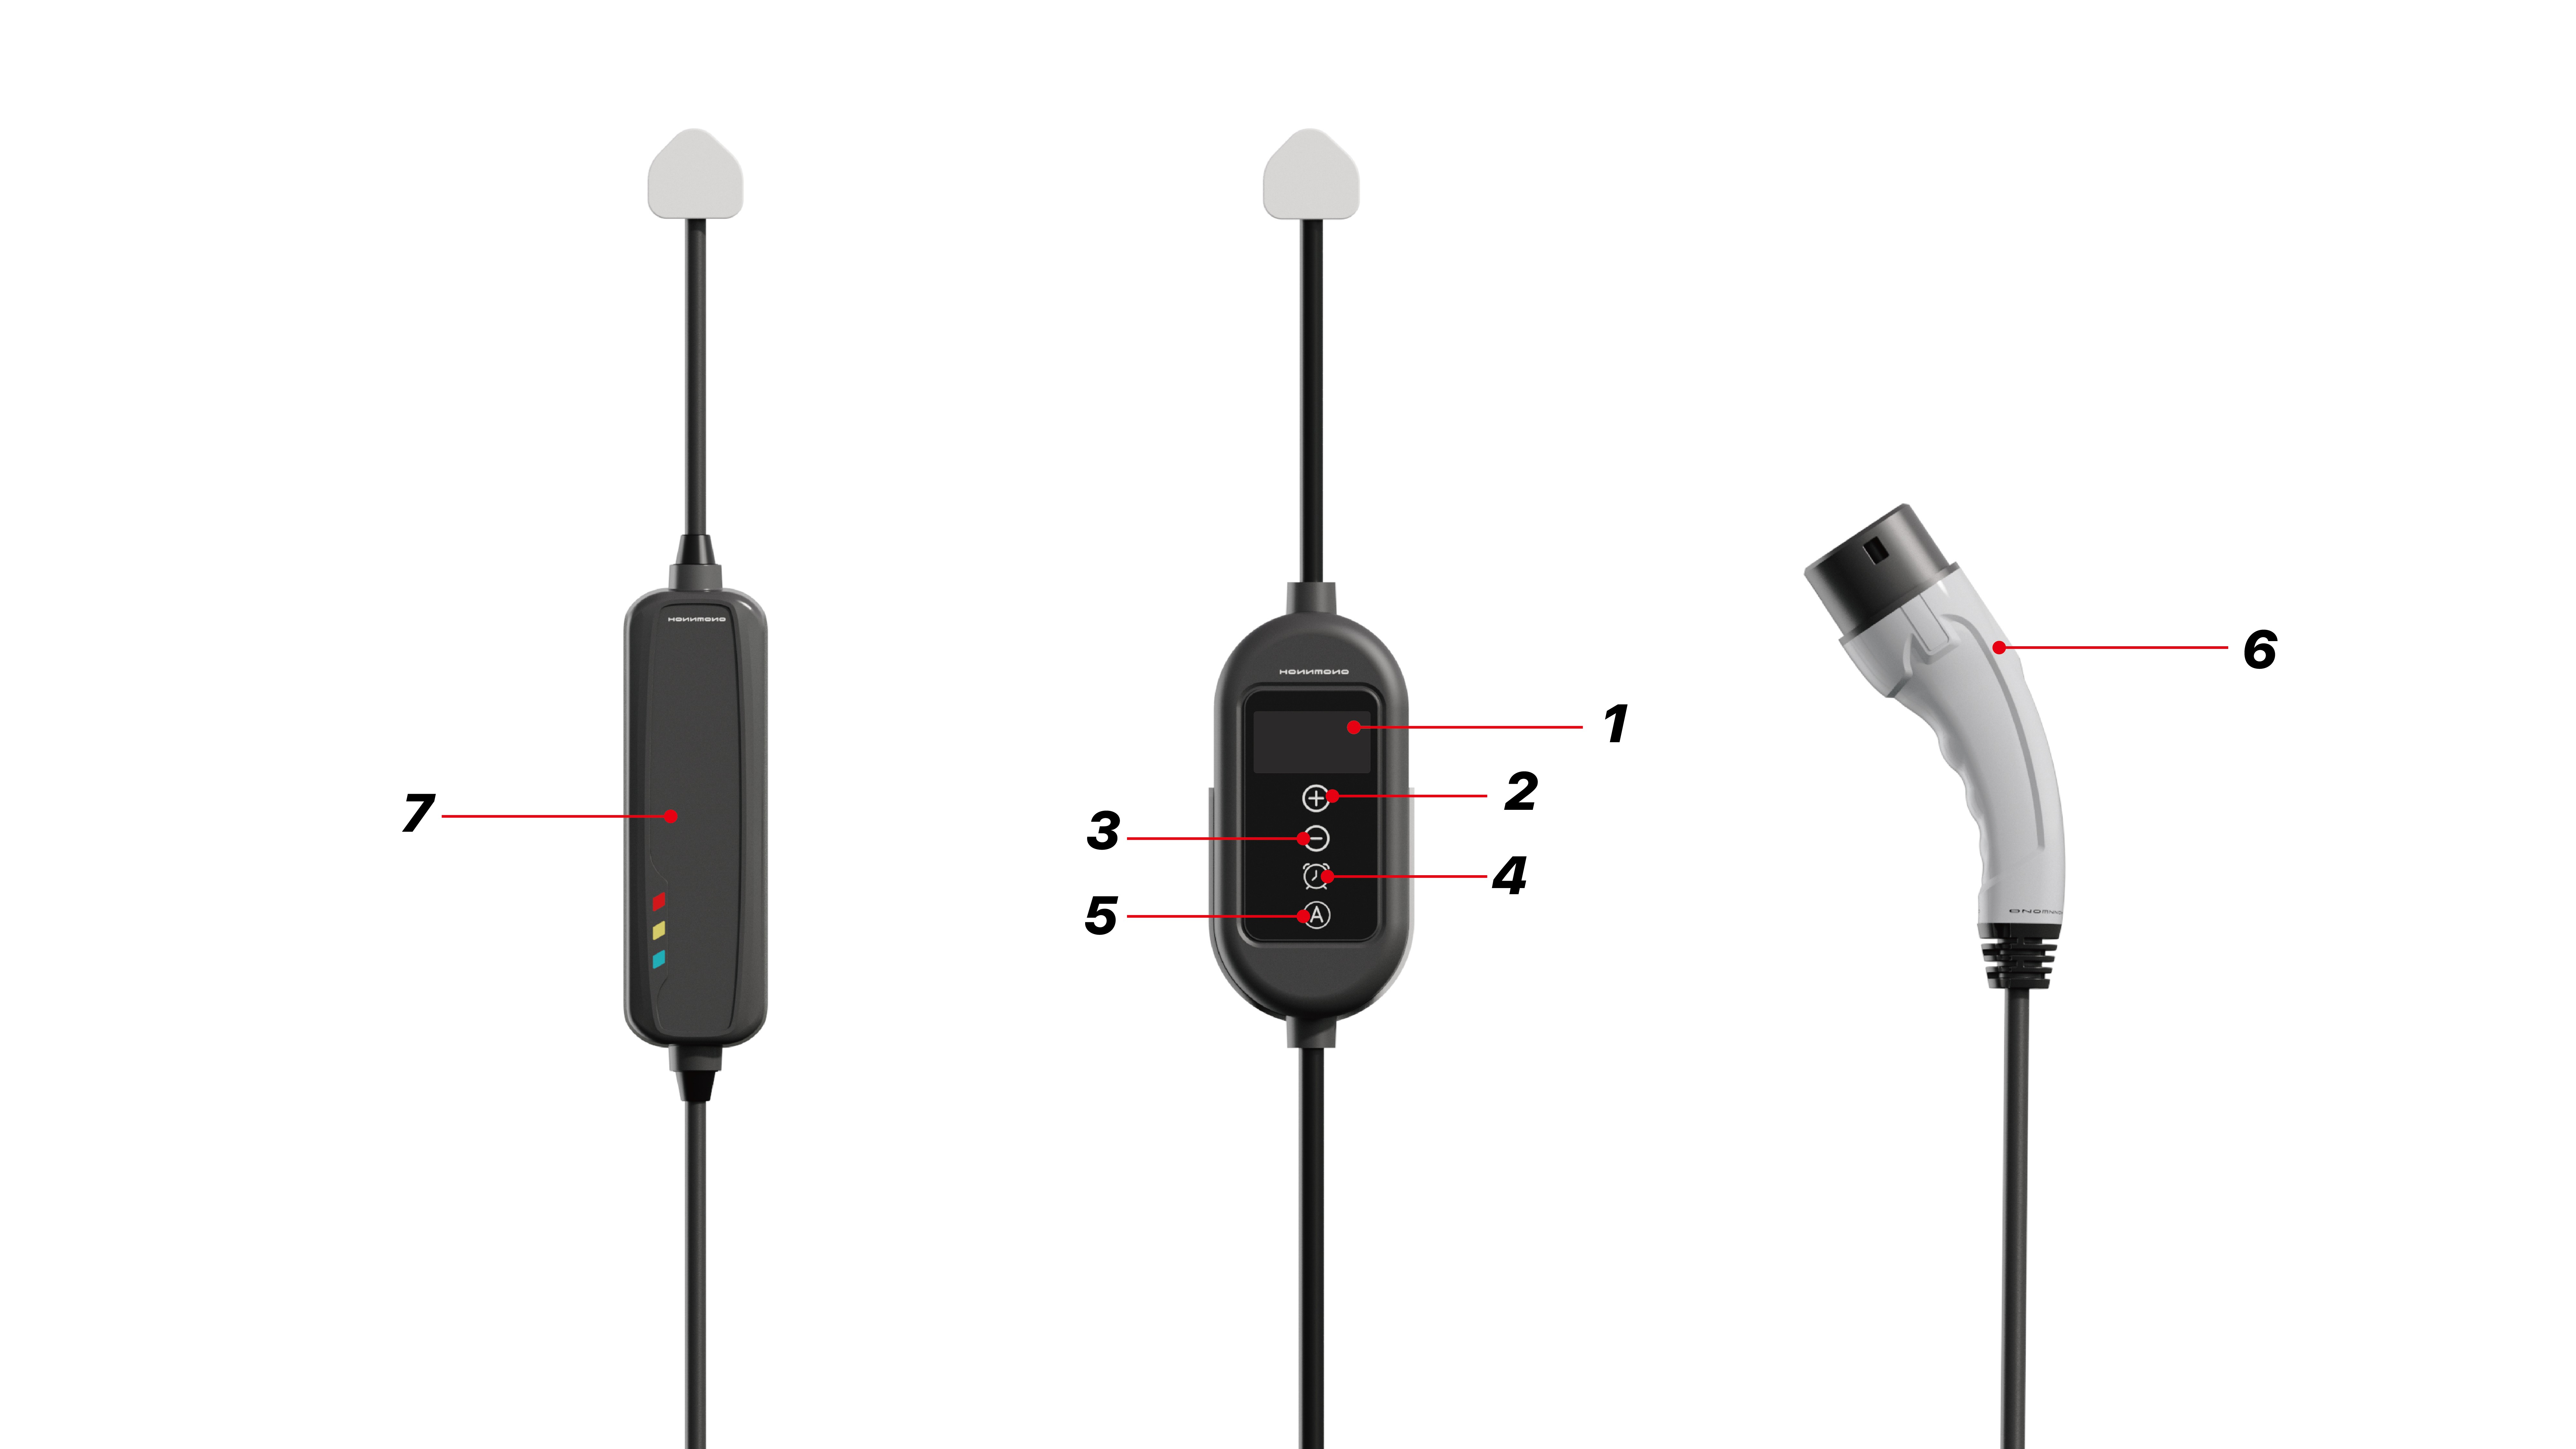
Display Screen
K1 Button: Increase Charging Current: Under the conditions of maximum charging current parameter editing status, short pressing this button can increase the maximum charging current value. Set Scheduled Charging Time: Under the conditions of scheduled charging time parameter editing status, short pressing this button can increase the scheduled charging time value (up to 12 hours).
K2 Button: Adjust Charging Current: Under the conditions of maximum charging current parameter editing status, short pressing this button can decrease the maximum charging current value. Set Scheduled Charging Time: Under the conditions of scheduled charging time parameter editing status, short pressing this button can reduce the scheduled charging time value.
K3 Button: Enter Scheduled Charging Time Settings: Press and hold for 2 seconds to enter the scheduled charging time parameter editing status. Use K1 and K2 buttons to adjust the time. After setting is complete, short press the K3 button to confirm.
K4 Button: Enter Maximum Charging Current Settings: Press and hold for 2 seconds to enter the maximum charging current parameter editing status. Use K1 and K2 buttons to adjust the current. After setting is complete, short press the K4 button to confirm.
Type-2 Charging Gun
No Screen Portable Charger
Parameter Editing Status: If there is no button operation within 10 seconds in parameter editing status, the system will automatically exit editing mode and return to the normal working display status.
Note: Please read the above instructions carefully before adjusting any parameters. Keep the electric vehicle charging box away from water sources to avoid moisture affecting the equipment performance. When the device is connected to power and in standby or charging mode, do not touch any part of the device except the screen.
02. Product Specifications
Product Specifications | |
|---|---|
Current | 8A/10A/16A/24A/32A/40A Adjustable |
Input Frequency | 50/60Hz |
Operating Voltage | 100V~220V |
Output Power | Up to 9.6 kW |
Insulation Resistance | >100MΩ |
Protection Level | IP55 (when connected) |
Operating Temperature Range | 30°C to 50°C (-22°F to 122°F) |
Material | ABS + PC Alloy |
Product Certification | CE, FCC |
Cable Sheath | TPU/TPE (Customizable) |
Cable Length | 5M (Customizable) |
03. Function Introduction
Screen Parameters and Function Descriptions (Screen Version)
1. Temperature Monitoring: The device is equipped with a real-time temperature monitoring system to ensure operational safety. If an unsafe temperature is detected, charging will automatically stop and will resume once normal conditions are restored.
2. Smart Error Correction: The integrated smart chip can automatically correct common charging errors, ensuring stable performance during the charging process.
3. Adjustable Rated Power: Users can switch the rated output power by simply pressing the designated button as needed.
4. Large Display Screen: The device features a large screen that clearly displays important charging information, including current, voltage, and charging status.
Screen Parameters and Function Descriptions | |
|---|---|
Serial Number | Meaning |
1 | Charging Time |
2 | Scheduled Charging Time |
3 | Cumulative Charging Energy |
4 | Charging Status |
5 | Fault Icon |
6 | Ground Icon |
7 | Maximum Charging Current |
8 | Temperature Display |
9 | Power Output |
10 | Voltage |
11 | Charging Current |
12 | Charging Indicator Light |
04. Charging Guide
Preparation
Ensure that the electric vehicle's charging interface and charging gun are clean and free from debris.
Before starting the charging process, confirm that the electric vehicle is parked and the power is turned off.
Connection
Connect the plug of the charging gun to a compatible power source.
Align the charging gun with the electric vehicle's charging interface, then gently insert it until it is securely connected.
Charging Process
After connecting, the control box screen will light up, indicating that the charging process has started.
Use the "+" and "-" buttons on the control box to adjust the charging current as needed.
To set the scheduled charging time, press and hold the corresponding button until the setting screen appears, then use the "+" and "-" buttons to adjust.
Completion
Once the electric vehicle battery is fully charged, the charging process will automatically complete.
To stop charging at any time, press the stop button on the control box.
Carefully disconnect the charging gun from the electric vehicle's charging interface, then disconnect the power supply.
After Charging
Wrap the cable together without knotting it, and then store the charging gun in a dry, cool place, avoiding direct sunlight.
05.Usage Precautions
Waterproof: Ensure that the electric vehicle charging box is never submerged in water.
Cable Maintenance: Avoid stepping on the cable or excessive bending or knotting.
Impact and Pressure: Protect the electric vehicle charging box from impacts and do not place heavy objects on top of it.
Heat Exposure: Do not place the charging cable near high-temperature objects during the charging process.
Temperature Range: Operate the equipment within the specified temperature range (-30°C to 50°C).
Power Supply: The minimum cross-section of the input cable on the power side should be 3*6mm².
Installation: Installation and distribution should be carried out by qualified professionals.
Charging Connector: Do not insert fingers into the charging connector when the power plug is connected to the power supply.
Cable Damage: If the cable is damaged, do not use the electric vehicle charging box.
Designated Use: This electric vehicle charging box is intended exclusively for charging electric vehicles.